Last time we discussed SAP Step-by-step LSMW Developer Guide, which you can find here Step-by-step SAP LSMW Developer Guide
Today let’s have a look at the User Guide.
Basics
LSMW is a standard SAP tool to do any kind of mass data changes.
In 99% cases, we use Batch Recording which works like macros in MS Excel/Word. The system follows user’s steps, recording screen by screen. Once done we map data file to these screens and data fields. Than system repeats the same steps like the user would be doing manually.
Organizing LSMW projects
In LSMW transaction we have projects, subprojects, and objects.
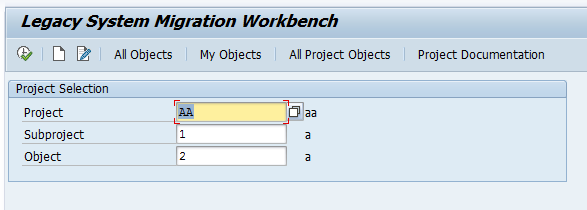
SAP LSMW
Ideally, there should be one global project for routine updates, one for data migration.
The subproject is something meaningful, like OM, PA, PT, and PY for different HR areas. Or it could be one subproject for all infotypes, no matter.
An object usually represents what’s being changed: infotype, table or something else.
To start we need to choose from all three entities: project, subproject, object.
Here is the main LSMW window. Steps “Define Object Attributes” to “Assign Files” are settings, other for execution for the end-user.
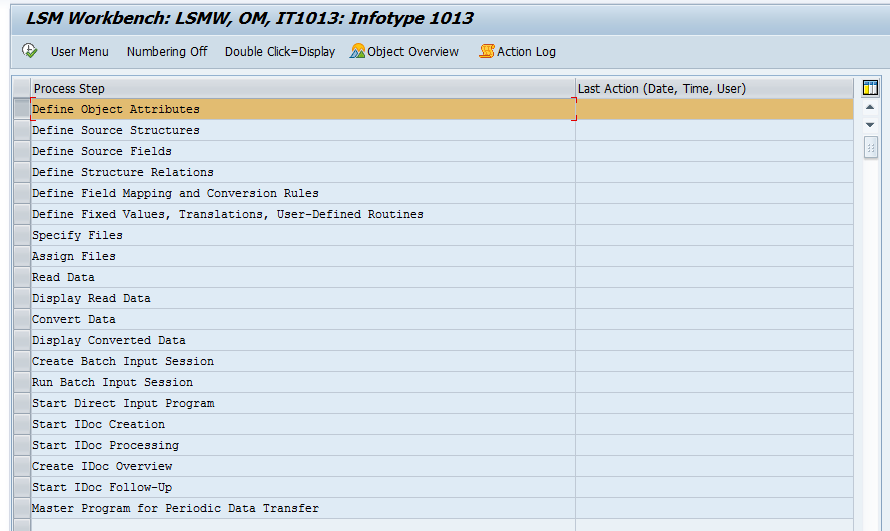
As a user you need to perform just 4 steps: specify file, read data, convert data, upload data.
Specify Files
Here we create a file reference. Change file path to your local PC. Keep all other parameters the same
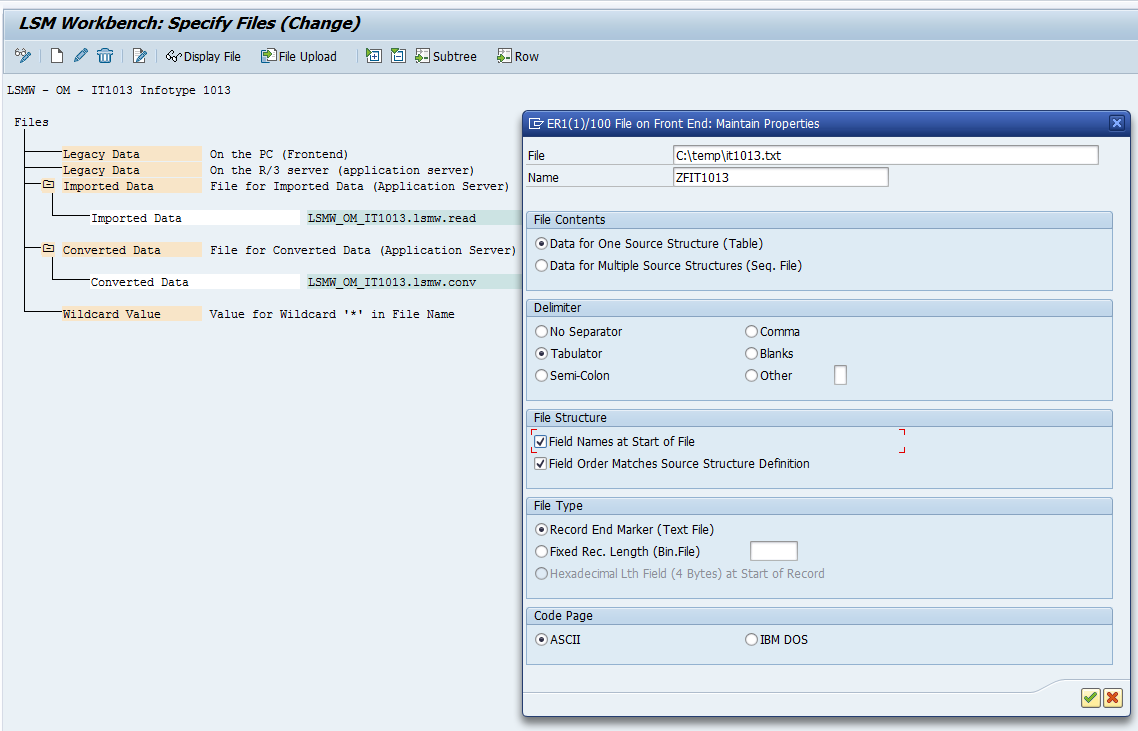
SAP LSMW Specify File
Save and exit.
Read Data
Here the system reads the file and converts to internal format on the server.
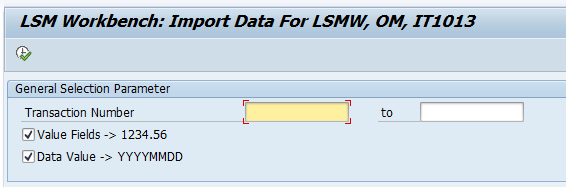
If the file is large and we want to test our LSMW project, delimit a number of records to read and process.
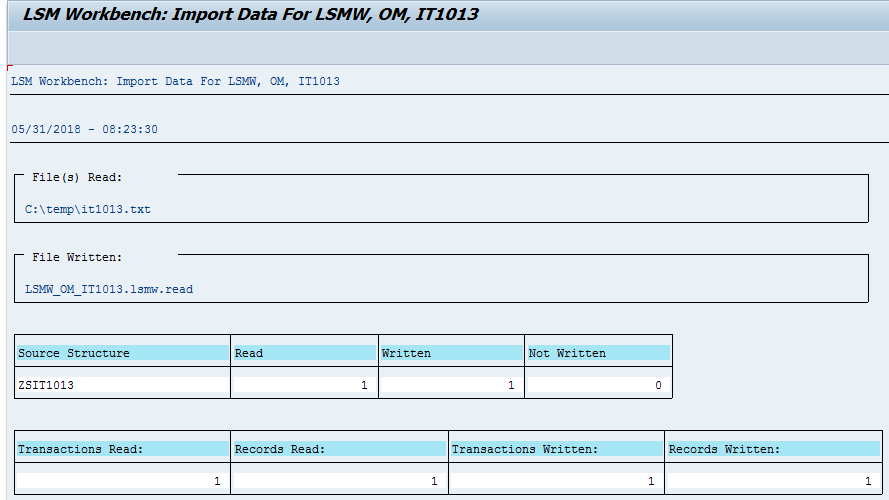
SAP LSMW Read Data Preview
Display Read Data
Here we can double check ourselves if the file was organized correct and data placed into right fields.
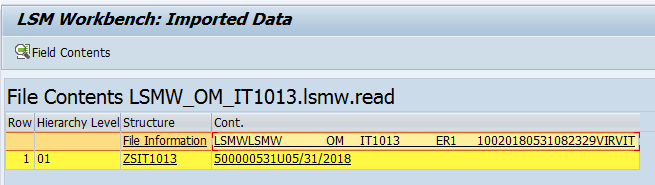
If you click on the data record, it shows record content parsed into source structure.
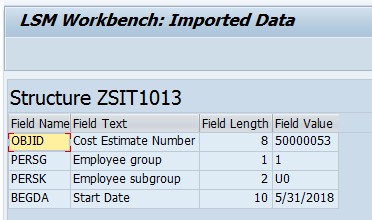
SAP LSMW Display Read Data Record
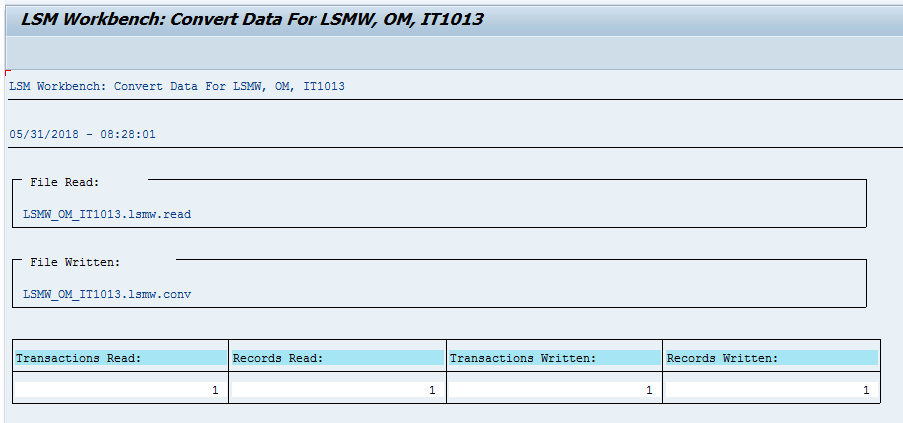
Convert Data
The system converts data from the source structure to the recording structure including all kind of mapping we’ve done on ‘Define Field Mapping and Conversion Rules’ step.
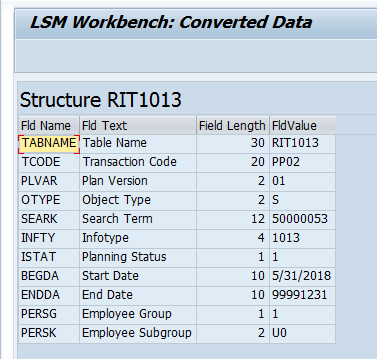
Display Converted Data
The same as display read data step but shows already converted data. This data will be entered during simulation (batch input).
Create Batch Input Session
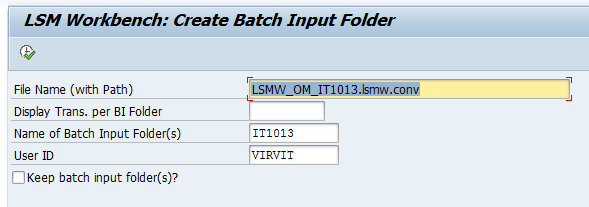
SAP LSMW Create Batch Recording
If you want to keep all recordings for your records, tick ‘Keep batch input folders’. Otherwise, the system deletes all successful recordings. Only failed will remain in the system until they are processed.
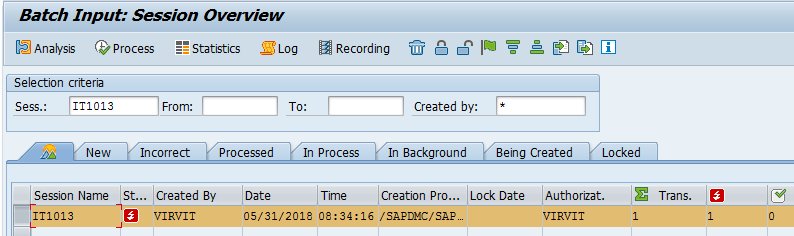
Run Batch Input Session
SAP opens a SM35 transaction with Batch Input sessions.
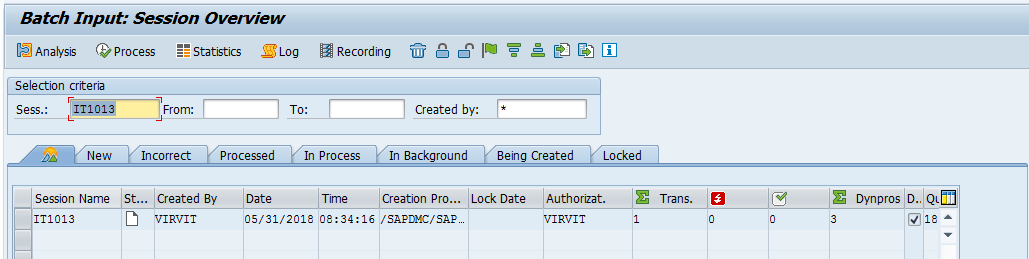
Select the recording and click ‘Process’.
SAP SM35 Start Processing Screen
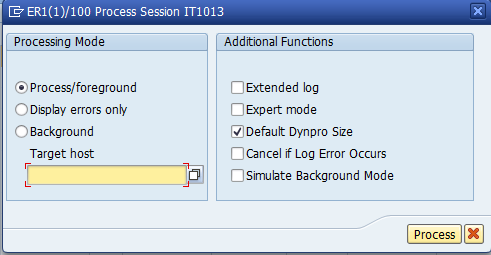
For 1 record to test it’s recommended to use ‘Process/foreground’ as the system shows every step on the screen with the data filled in.
Display error only is to run the process in the foreground and stop only on errors, so that user could react somehow.
In case of a large volume, it’s better to run in the background. It’s the fastest way.
To update the screen with the current status click ‘Enter’ on a keyboard.
If the record was not processed it would show errors in the log.
If we double-click on the recording there is a tab with a log. Once errors fixed (most common the employee or OM object is locked by another user) you can restart recording process. It will run ONLY for incorrect records.
Once all errors are fixed and recording is processed it will disappear from the list.
It means no more error occurred and we can verify the data.
